

A water softener goes in where the main water line enters the house, between the main shutoff and the water heater. The job is easy or hard depending on four things: whether your home already has a water softener loop, whether a drain is close, whether there is an outlet, and whether pipes have to be cut. This guide shows each of those with labeled diagrams, so you can see what your setup needs before you buy anything or call a plumber.
Written by Sara Ibrahim. Sara researches home and kitchen products for Cupindy.
Published: May 2, 2026 · Last updated: September 27, 2026
How this guide was made: from the installation manuals of Pentair, Rheem and Whirlpool, AirGap International's code guidance, and 2026 cost data from Angi and HomeGuide. We have not installed these systems ourselves; every number below is taken from one of those sources and named where it appears. This guide does not replace your model's manual or local plumbing code.
Most installs follow the same order: shut off the main, connect the softener's bypass valve to the house plumbing (IN from the main, OUT to the house), run a 1/2 in. drain line to an air gap above a drain, plug in the control valve, add salt, set the hardness, then turn the water back on slowly and check for leaks. A replacement can take under an hour; a new install usually takes 2 to 4 hours.
If you have a softener loop (two pipe stubs or a U-shaped pipe near the water heater or main line, often in the garage), the plumbing is already there and many homeowners do it themselves. Without a loop, the main line has to be cut and a return line added, and that is plumber work in most homes.
As an Amazon Associate we earn from qualifying purchases.
1. Test your water first. The hardness number sets the softener size and the setting you program in. A strip kit such as the Varify hardness test kit takes a minute.
2. Our pick for a DIY install: the Aquasure Harmony 48,000 grain. It ships with the resin loaded, a bypass valve and a metered control valve, which is what makes a loop install a same-day job. It is one of the most-bought softeners in Amazon's whole-house results, with more than 3,000 ratings.
Check the Aquasure on AmazonDIY or professional installation? A quick decision table
| Your situation | Better choice | Why |
|---|---|---|
| Existing softener loop, drain and outlet nearby, or replacing an old softener in the same spot | DIY is realistic if you are handy | The plumbing is already there. You connect the bypass, run the drain line and program the valve. |
| No softener loop | Professional recommended | The main line has to be cut and a return line added so soft water gets back into the house. |
| No drain within about 25 to 30 ft, or the drain route is unclear | Professional recommended | Manuals limit drain length and height, and most codes require an air gap. |
| Copper pipe that needs soldering near the unit | Professional strongly recommended | Pentair warns that its plastic valve parts melt in a torch flame. |
| Unsure about permits, backflow rules or electrical access | Professional recommended | Rules vary by city and county. |
What is a water softener loop?
A water softener loop is plumbing a builder leaves ready for a softener. The main water line is routed to one spot, usually in the garage or next to the water heater, with two pipe stubs: one carries hard water in from the main, the other carries water out to the house. Until a softener is installed, the two stubs are joined by a short U-shaped pipe, or they are capped with the water routed past them.
Outdoor hose bibs are normally teed off before the loop, so lawns and gardens keep getting hard water. Rheem's manual says outside faucets should stay on hard water to avoid wasting softened water and salt, and Pentair's says the same.

What does a water softener loop look like?
Look near the main shutoff, the water heater or the garage wall facing the street. You are looking for one of these:
- Two pipe stubs coming out of the wall or floor a few inches apart, often with shutoff valves or caps.
- A U-shaped pipe (the jumper) joining two stubs, sometimes with a label from the builder.
- A drain and an outlet close to the stubs. Builders who add a loop usually add both, because a softener needs them.
Loops are common in newer homes in hard-water regions, where builders often offer them as an option. If you see nothing like this near the main line, assume there is no loop and plan for plumbing work.
How to tell which loop pipe is IN and which is OUT
Getting this backwards is the classic loop mistake: the water goes through the softener the wrong way and does not get softened. Every control valve is marked IN and OUT, usually with an arrow, so the only question is which stub is which.
- Trace the pipe back. The IN stub connects to the main shutoff side. Follow it through the wall or garage toward where the line enters from the street or well.
- Check which side feeds the hose bibs. The hose bib tee is on the hard-water side, before the loop.
- Look for builder labels on the stubs or the wall.
- Still not sure? Stop and ask a plumber. On DIY forums the usual answer is to cut the pipe and watch which side the water comes from, which is a job for someone who can repair the cut if it goes wrong.
How to install a water softener with a loop
- Shut off the main water supply and open a low faucet to drain the pressure.
- Cut out the U-jumper, or remove the caps, leaving clean pipe ends on both stubs.
- Put the softener in place and set its bypass valve to bypass.
- Connect the IN stub to the valve's IN port and the OUT stub to the OUT port. Flexible stainless connectors make this easier than hard pipe, because the stubs never line up exactly with the valve.
- Run the drain line and the brine tank overflow (see the drain section below), then plug in the control valve.
- Turn the main back on slowly with the valve still in bypass, check every joint, then follow your manual to move the valve to service, purge the air and run the first regeneration.

Two 24 in. stainless connectors with 1 in. female threads on both ends, lead-free and NSF-61 listed. Flexible lines take up the gap between the loop stubs and the bypass valve without cutting and fitting rigid pipe.
The catch: female threads on both ends, so your loop stubs and bypass need male threads of the same size. Check your valve before ordering; many use 1 in., some use 3/4 in.
Check the TTFLEX connectors on AmazonHow to install a water softener without a loop
Without a loop, the installer cuts into the main line after the main shutoff and after the hose bib tee, then brings the softened water back into the house line. In a slab house that can mean running a new pipe to where the water heater is. American Home Water, a water treatment dealer, quotes $400 to $900 to connect a softener to an existing line and $600 to $2,000 to add a full loop. Most homeowners hire this out. Some installers do not charge extra for no-loop jobs, so ask when you collect quotes.
Building a new home? Ask for the loop now
Rough-in is the cheapest time to add a loop. Ask the builder for the loop stubs, a drain (a standpipe or floor drain) and an outlet in the same spot, with enough floor space for two tanks and room to carry in salt bags. Adding the same thing after the walls are closed is what costs hundreds to thousands of dollars.
Water softener loop in the garage
A garage loop is the most common setup. Check two things: temperature and space. Pentair lists an operating range of 40 to 100°F, and Rheem says not to install where it freezes, so an unheated garage in a cold climate needs protection. Leave room to lift the brine tank lid and pour in a 40 lb bag of salt.
Where should a water softener be installed?
A whole-house softener goes near where the water enters the home, after the main shutoff and before the water heater. Rheem's manual says to install the softener between the water inlet and the water heater, so the heater gets soft water and less scale. Pentair adds a caution: avoid a very short pipe run between the softener and the heater, because hot water can back up into the softener. Some installs add a check valve for that reason.

When you need a pre-filter before the softener
A softener removes hardness (calcium and magnesium). If you are on well water, test for more than hardness first. Sand, sediment or iron can foul the resin, and a sediment or iron filter before the softener may be needed. On city water, a pre-filter is usually optional. Let the water test decide, not a sales pitch.
Water softener plumbing diagram: how the water flows
Here is the whole path in one picture, from the main shutoff to the water heater, with the drain and overflow lines that most diagrams leave out.

- Main shutoff. Everything below happens after it.
- Sediment pre-filter (optional). For well water, sand or iron.
- Bypass valve. In the service position water goes through the softener; in bypass the house gets hard water while you work on the unit.
- Control valve and resin tank. Water enters the IN port, passes through the resin, and leaves the OUT port softened.
- Brine line. A small tube to the salt tank that the valve uses during regeneration.
- Drain line. Carries regeneration water away; ends above an air gap.
- Brine tank overflow. Its own gravity line, never joined to the drain line.
- Soft water out to the water heater and indoor taps.
How to plumb a water softener: pipe materials
- Copper: solder any joints before the softener is attached, or away from it. Pentair warns not to point the torch at the system because its plastic parts melt.
- PEX or CPVC: use adapters that match your valve's connection. Push-fit fittings are common for DIY because they need no torch.
- Metal pipe used as an electrical ground: Pentair says to use a bypass of the same material or install a grounding jumper wire across the softener, so the plastic unit does not break the ground path.
- Thread tape on threaded joints, and no over-tightening on plastic valve ports.
Water softener installation steps
The order below matches the manuals we used. Your model's manual comes first where it differs.

1. Test your water hardness and size the softener
Test before you buy: the hardness in grains per gallon (gpg) decides the capacity you need and the number you program in. To convert, 1 gpg equals 17.1 mg/L (ppm). If your utility publishes a water quality report, compare it with your own test. Our water softener guide covers sizing.

A 150-strip hardness kit with a color chart. Use it before choosing a softener, again to set the hardness on the control valve, and after the first regeneration to confirm soft water is coming out.
The catch: Amazon's review summary is mixed on accuracy and on reading the color chart. Treat the result as a range, and compare it with your utility's report if you have one.
Check the Varify kit on Amazon2. Shut off the water and relieve pressure
Close the main shutoff, turn off the water heater (gas to pilot, or power off for electric), and open a low faucet to drain the lines.
3. Place the tanks
Set the resin tank and brine tank on a level floor, near the loop or main line, within cord reach of an outlet and within drain range. Leave room to refill salt.
4. Connect the bypass valve and the IN and OUT lines
Fit the bypass valve to the control valve first, set it to bypass, then connect the house plumbing. Check the arrow on the valve body: IN must face the main. Rheem's manual puts it simply: the hard water supply pipe goes to the valve inlet side.
5. Run the drain line and the overflow line
Connect 1/2 in. ID drain tubing to the valve's drain fitting, clamp it, and end it above an air gap on a standpipe, laundry drain or floor drain. Then run the brine tank overflow as a separate line to a drain lower than the tank fitting. Details and limits are in the next section.
6. Plug in the control valve
Most control valves run on a plug-in transformer. Whirlpool specifies a 120V grounded outlet with circuit protection. In garages and basements, local code may require a GFCI outlet.
7. Add salt and program the valve
Add softener salt to the brine tank (Whirlpool says to fill it about half full), then set the time, your hardness and any other settings your manual lists.
8. Turn the water on, purge air and regenerate
Open the main slowly with the valve still in bypass, and check every joint. Then follow the manual to move to service in stages so air escapes, open a cold tap until the water runs smooth, and start a manual regeneration. Check the joints again during and after that first cycle.
9. Sanitize the system
Manuals ask for a sanitizing step after installation. Pentair's, for example, mixes 3/4 cup of unscented 5.25% household bleach with 1 quart of water, and the manual says where to pour it and when to regenerate. Use the product and amount your own manual names.
10. Retest the water
After regeneration, test a cold tap. If the water is not soft, check that the valve is in service (not bypass), the IN and OUT are not reversed, and the hardness setting is right.
How long does it take? Whirlpool says a replacement can be done in under an hour and a new install in a few hours. Angi puts the average at 2 to 4 hours.
Drain line, air gap, bypass valve and outlet
These three details decide whether an install is safe and to code, and they are where most DIY installs go wrong.

Drain line rules
| Detail | What the manuals say |
|---|---|
| Tubing size | 1/2 in. inside diameter flexible tubing (Pentair, Whirlpool) |
| Length | Pentair: avoid drain lines over 25 ft. Rheem: avoid runs over 30 ft. Whirlpool: not more than 30 ft from the softener |
| Height | Rheem and Whirlpool: do not raise the drain line more than 8 ft above the floor |
| Air gap | Required by most local codes. AirGap International says codes require at least 1 in., measured vertically; Rheem's manual asks for 1-1/2 in. |
| Where it can go | A floor drain, laundry standpipe or utility sink, with the air gap above it |
| Brine tank overflow | Its own gravity line, no higher than the tank fitting. Rheem: do not connect the valve drain tubing to the overflow hose |
Why the air gap matters: if the tube is pushed into the standpipe and the drain backs up, the end of the tube sits in waste water, which can be siphoned back toward the softener. The open gap makes that impossible.

A UPC and IPC listed air gap from AirGap International with a 1/2 in. barb for standard drain tubing and a 1-1/2 in. outlet with PVC adapters. It gives you a code-style gap and a splash guard instead of a tube taped into a pipe.
The catch: fewer than 100 ratings, and it fits a 1-1/2 in. standpipe; other sizes need adapters. The same maker sells a version for a 2 in. washer box.
Check the air gap on AmazonBypass valve
The bypass lets you isolate the softener for repairs while the house keeps running water. Many units ship with a plastic bypass that attaches to the control valve. Some plumbers add a three-valve bypass (two shutoffs plus a crossover) instead; Rheem shows it as an optional setup.
Electrical outlet
A standard grounded outlet within cord reach. HomeGuide puts a new dedicated circuit at $250 to $900 if none is nearby, which is worth knowing before you choose a location.
Water softener installation cost
Installation cost depends mostly on whether there is a loop, how far the drain and outlet are, and local labor rates. This section covers installation only; for system prices, salt and upkeep see our water softener cost guide.
| Cost item | Typical range | Source |
|---|---|---|
| Installation, national average | About $1,500 (range $200 to $6,000) | Angi, updated Aug 2026 |
| Labor for a basic system | From about $150 | Angi |
| Softener plus installation | $1,200 to $3,800 | HomeGuide |
| Plumber time, typical install | 1 to 2 hours at about $85 to $125 per hour | Mid Atlantic Water |
| Installing without a loop (tying into the main line) | $400 to $900 | American Home Water |
| Adding a softener loop | $600 to $2,000 | American Home Water |
| New dedicated electrical circuit | $250 to $900 | HomeGuide |
| Extra plumbing runs | $0.50 to $8 per linear foot | Angi |
The cheapest case is a replacement or a loop install done yourself: you pay for the softener, connectors, drain tubing and an air gap. The most expensive is a no-loop house with the drain and outlet far from the main line.
DIY vs professional water softener installation

How hard is it to install a water softener?
With a loop, a drain and an outlet already in place, it is a moderate DIY job: you connect two lines, run a drain tube, add salt and program a valve. Without a loop it becomes real plumbing: cutting the main line, adding a return line, and often soldering or crimping. That is where a mistake costs more than the plumber.
If you install it yourself: softeners built for DIY
What makes a softener DIY-friendly is simple: resin already loaded in the tank, a bypass valve in the box, standard 1 in. connections, and a metered control valve that regenerates by water use. Both picks below have all four. We chose them by Amazon rating, number of ratings and what is in the box; we have not installed them ourselves.
As an Amazon Associate we earn from qualifying purchases.

A 48,000 grain whole-house softener with a metered digital control valve, bypass valve and resin preloaded. Aquasure rates it for homes with 3 to 4 bathrooms. Amazon's review summary says buyers find it easy to install with good instructions, and it is one of the most-bought softeners in Amazon's whole-house results.
The catch: rated 4.4 out of 5, just under what we usually require, and the review summary says durability is mixed, with some buyers reporting a failure after about a month. Register it for the extended warranty the maker offers.
Check the Aquasure on Amazon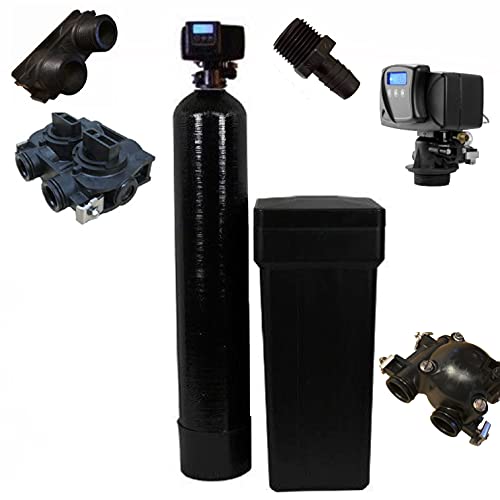
Built on the Fleck 5600 SXT, a widely used control valve, so parts and plumbers who know it are easy to find. It ships with resin in the tank, a plastic bypass, a 1 in. yoke and a brine tank with a safety float.
The catch: far fewer ratings than the Aquasure (hundreds, not thousands), and Amazon's review summary mentions leaks, particularly from the bypass valve. Check the bypass O-rings before you turn the water on.
Check the Fleck 5600 SXT on AmazonEverything you need for a DIY install
As an Amazon Associate we earn from qualifying purchases.
| Item | Why you need it | |
|---|---|---|
| Aquasure Harmony 48,000 grain | The softener: resin, bypass and metered valve included | See it |
| Fleck 5600 SXT 48,000 grain | Alternative on the common Fleck valve | See it |
| TTFLEX 1 in. connectors | Joins loop stubs to the bypass without rigid pipe | See it |
| Air Gap International ET117-008 | Code-style air gap for a standpipe drain | See it |
| Varify hardness test kit | Test before sizing, and after to confirm | See it |
Also have on hand: 1/2 in. drain tubing long enough to reach the drain (some units include it), hose clamps, thread tape, adapters for your pipe type, a bucket, towels, and softener salt for the first fill.
Replacing an old water softener
A replacement is the easiest install when the new unit fits the same spot: the loop, drain and outlet are already there. Whirlpool says a replacement can be done in under an hour. Before you buy, check the new valve's connection size against your existing plumbing, retest hardness rather than copying the old settings, and ask whether the installer hauls the old unit away.
Common water softener installation mistakes
- Connecting IN and OUT backwards, so the softener does not soften.
- Pushing the drain tube into the standpipe instead of ending it above an air gap.
- Joining the brine tank overflow to the valve drain line.
- Running the drain line too far or too high for the valve to push water through.
- Soldering copper next to the softener and melting plastic parts.
- Leaving outdoor hose bibs on softened water and wasting salt.
- Installing in an unheated space that freezes.
- Skipping the hardness test and programming a guess.
- Skipping the sanitizing step and the leak check after the first regeneration.
What is included in a professional softener installation?
Quotes vary a lot in what they cover. Ask each installer to confirm, in writing:
- Connection to the loop or main line, with all fittings and the bypass valve
- Drain line with an air gap, and the brine tank overflow
- Any new outlet or circuit, or whether you need an electrician
- Permit and inspection, if your city needs one
- Programming, sanitizing and the first regeneration
- Leak check and a hardness test after install
- Removal of the old unit
- The labor warranty, separate from the product warranty
Final water softener installation checklist
- Water tested for hardness (and iron or sediment on a well)
- Loop found, or a plan and quote for a no-loop install
- IN and OUT identified before any cut
- Drain within about 25 to 30 ft and no more than about 8 ft up, with an air gap
- Outlet within cord reach; GFCI if your code needs it
- Space above freezing, with room to refill salt
- Hose bibs left on hard water
- Permit question answered
FAQs
Can I install a water softener myself?
Yes, if your home has a softener loop or you are replacing a softener in the same spot, and there is a drain and an outlet nearby. If pipes must be cut, soldered or rerouted, hire a plumber.
How long does it take to install a water softener?
Whirlpool says a replacement can take under an hour and a new install a few hours. Angi puts the average at 2 to 4 hours. A no-loop install with new plumbing takes longer.
What does a water softener loop look like?
Two pipe stubs a few inches apart, often joined by a U-shaped pipe or capped, near the main line or water heater, usually in the garage. A drain and an outlet are often nearby.
How do I know which loop pipe is IN and which is OUT?
The IN stub connects back to the main shutoff, on the same side as the hose bib tee. If you cannot trace it or find a builder label, ask a plumber before cutting anything.
Can I install a water softener without a loop?
Yes, but the main line has to be cut after the shutoff and hose bib tee, and soft water piped back into the house line. American Home Water quotes $400 to $900 for that, and $600 to $2,000 to add a full loop.
Does a water softener need a drain?
Salt-based softeners do, for the regeneration water. The drain line is usually 1/2 in. tubing that ends above an air gap on a floor drain, standpipe or laundry drain.
Do I need an air gap for a water softener drain?
Most local codes require one. AirGap International says codes require at least 1 in. of open space, measured vertically, and some manuals, such as Rheem's, ask for 1-1/2 in.
Do I need a permit to install a water softener?
It depends on your city or county. Some treat a replacement differently from new plumbing work. Check with your local building department.
Can the softener drain into a washing machine standpipe?
Often yes, as long as the drain line ends above an air gap and is secured so it cannot slip into the pipe. AirGap International sells air gaps made for 2 in. washer boxes.
Should a water softener go before or after the water heater?
Before. Rheem's manual says to install the softener between the water inlet and the water heater, so the heater receives soft water.
Should outdoor faucets get softened water?
Usually not. Pentair and Rheem both say outside faucets should stay on hard water, so hose bibs are teed off before the softener.
Does a water softener need electricity?
Most do: the control valve runs on a plug-in transformer and needs a nearby grounded outlet. Some non-electric twin-tank models exist but are less common.
How much does water softener installation cost?
Angi puts the average at about $1,500, with a range of $200 to $6,000. HomeGuide puts a softener plus installation at $1,200 to $3,800.
Can a water softener be installed outside?
Only in warm climates and under cover. Pentair lists 40 to 100 degrees F as the operating range, and Rheem says not to install where it freezes.
How we chose the products
We looked for softeners that a homeowner can install without special tools: resin preloaded, bypass included, 1 in. connections and a metered valve. We then compared Amazon ratings, number of ratings and recent sales, and read Amazon's review summaries for the most common complaint, which we list as "the catch" on each card. We have not installed or tested these units. The accessories are the parts the manuals call for: connectors, an air gap and a hardness test. As an Amazon Associate we earn from qualifying purchases.
About the author
Sara Ibrahim researches home and kitchen products for Cupindy. For this guide she worked from manufacturer installation manuals, code guidance and published cost data, and names each source where it is used.
Sources
- Pentair: Whole House Water Softening System installation manual
- Rheem: Water softener installation and operation manual
- Whirlpool Water Solutions: How to install a water softener
- AirGap International: Plumbing codes
- Angi: Water softener installation cost
- HomeGuide: Water softener cost
- American Home Water & Air: Water softener loop installation
- Mid Atlantic Water: How to install a water softener
- Water Quality Association: Ion exchange fact sheet


